SMART SALTING FOR WATER QUALITY
A guide for maintaining safe surfaces in the winter while reducing excess.
Steps for Smart Salting:
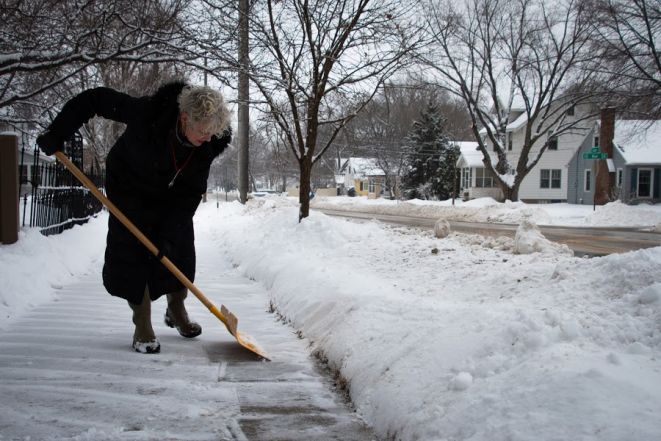
"Shovel first, shovel often."
The first step is always to physically remove as much snow and ice as possible. Early removal avoids the creation of more work by helping to prevent slippery and compacted surfaces. Shoveling a few times prevents a big pile-up of snow to remove, which is also easier on the back and safer overall.
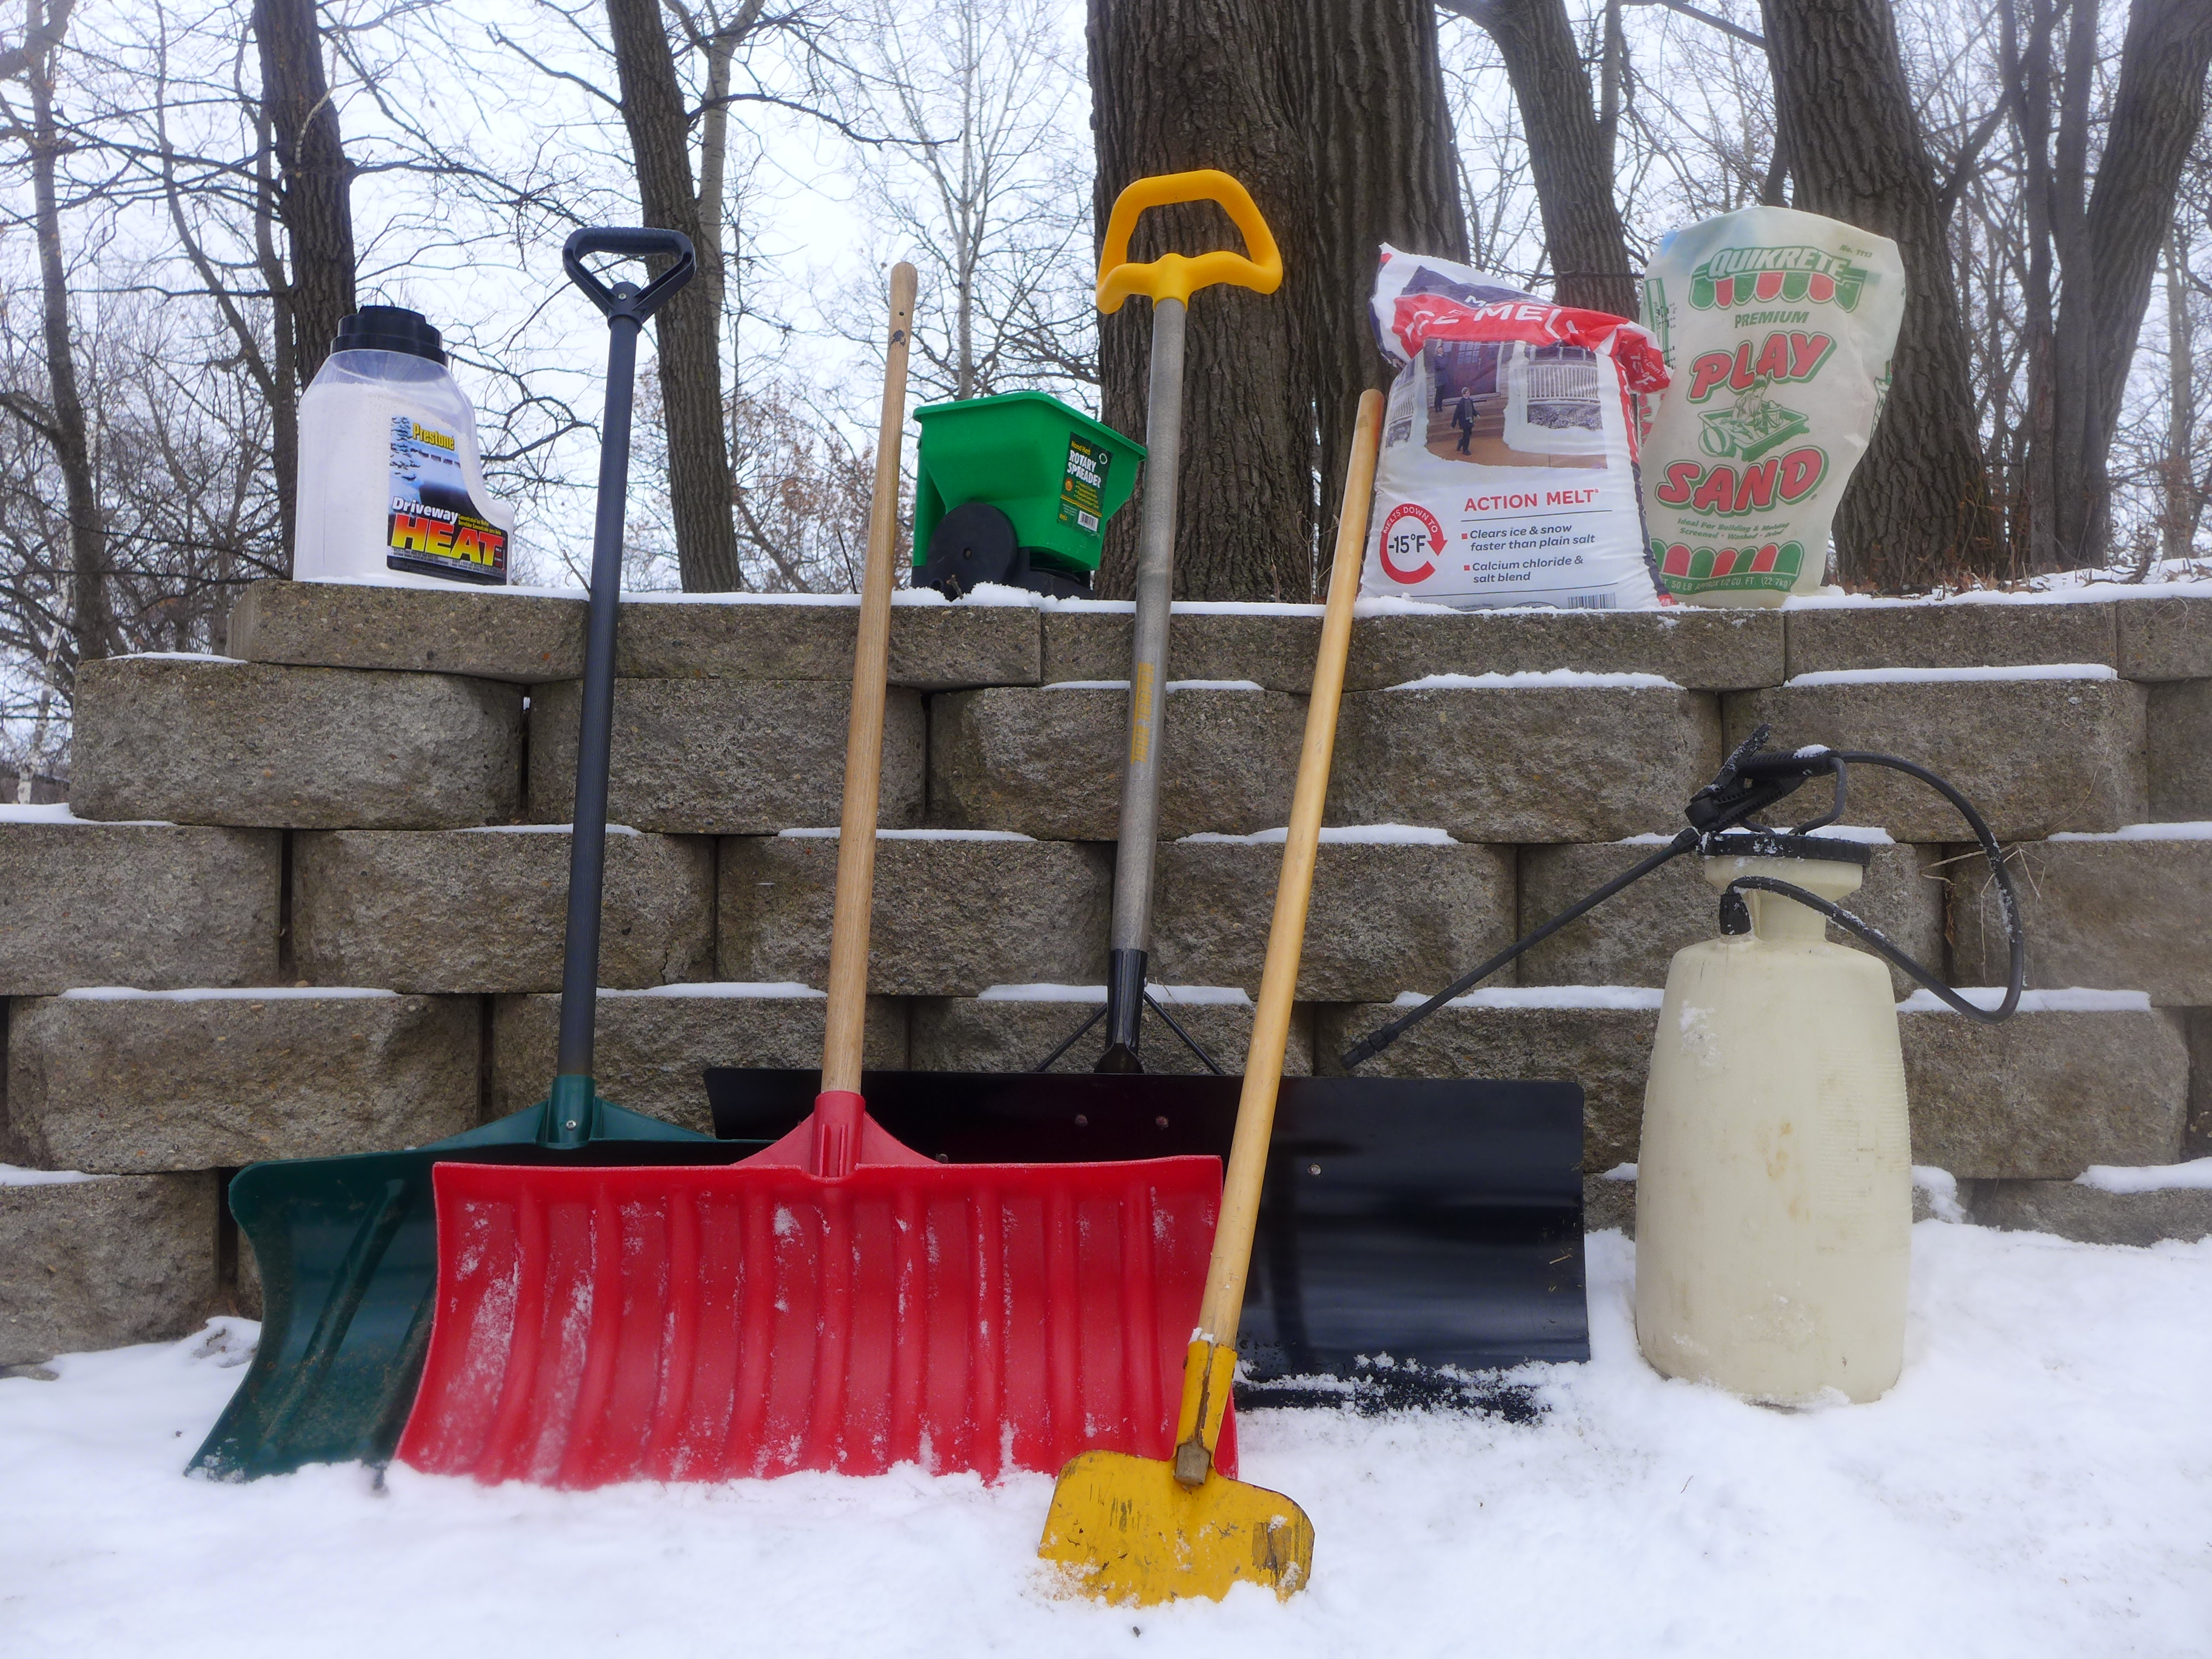
Keep a variety of tools organized and on hand to accommodate for different conditions and make the job easier:
- Broom
- Scoop shovel (snow)
- Flat landscaping scoop shovel (typically used in summer)
- Push shovel
- Ice chisel
- Ice scraper
Never apply salt or de-icer to loose or freshly fallen snow. This is an ineffective use of salt, creating a slushy or potentially unsafe surface that requires more clean-up later on.
Get creative - most shovels can be flipped upside down for scraping or dislodging compacted snow.
Don't forget about shovels typically used in the summer! Flat metal scoop shovels can be a great tool for breaking up and scooping compacted snow or ice that forms beneath snow.
For most winter weather, the work stops here. Check and evaluate these things before moving on:
- Check the surface conditions in both low and high traffic areas and evaluate how they'll be used. Is it a major walkway, or the far side of a driveway? Is it mostly walkable or is there still a solid sheet of ice?
- Check the weather to see if temperature can be factored in. Is there a warm-up on the way or is temperature expected to drop and stay below freezing?
- Will you or someone else be around to check up on it? A quick 5-10 minute follow-up may be the best way to guarantee a safe surface with no lingering side effects.
Save time and get the most out of a product by picking your strategy ahead of the storm and paying attention to the conditions at hand.
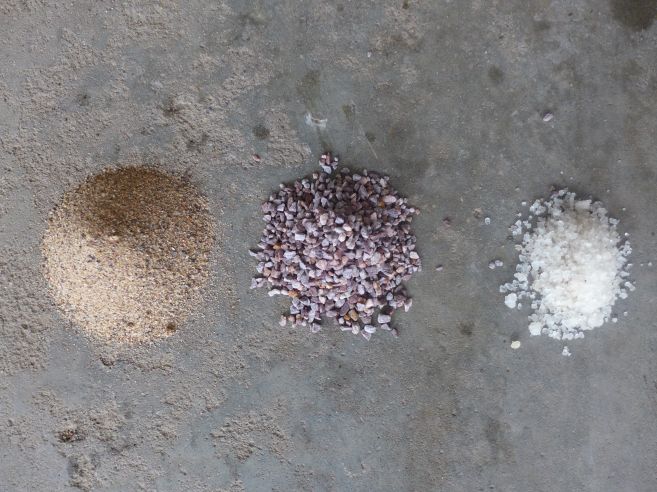
For small sites when shoveling and scraping isn't enough, first reach for grit or sand. These provide temporary traction and should be swept-up both for environmental impact and for re-using later on. Straw can also provide temporary traction and offers a visual to bring attention to icy spots.
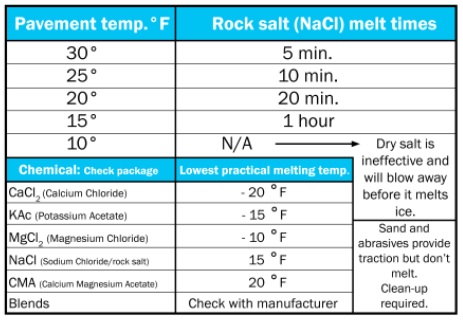
Plain rock salt (sodium chloride, NaCl) is ineffective below 15 °F. For colder temperatures, utilize calcium chloride, magnesium chloride, or another product in the chart below.
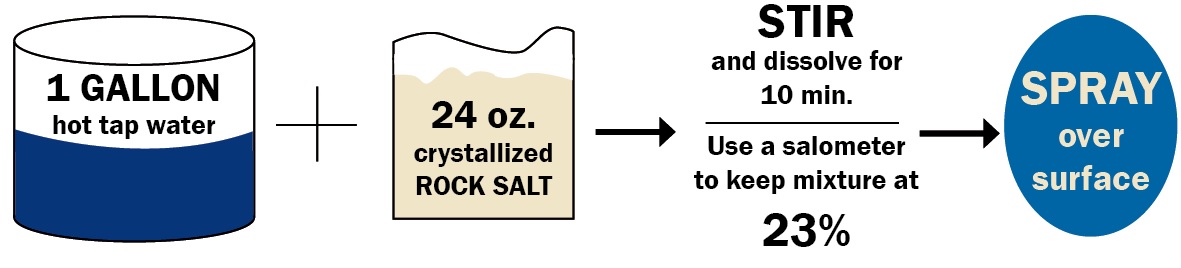
If you have a strong need for bare pavement due to safety concerns or community members having a high risk for falls, a brine strategy may be another option to apply salt strategically yet use less overall. Brines, or anti-icing, are applied before a winter storm, and prevent ice from bonding to the pavement from the start. Store a brine in a closed container for later use, but be careful to mix only as much as you'll need. Dispose of extras in a household drain and not on pavement. Avoid completely coating surfaces - just a light, dotted spray helps prevent ice from bonding. Many municipalities apply anti-icing stripes on roads with ~3" gaps between each line of brine, and this increases the effectiveness of physical removal.
For especially cold conditions, try sand or grit for temporary traction. Sand and grit can also be applied to loose snow if needed. Acetates are a non-chloride option, but still require the same careful application because they contain nutrients that can reach waterbodies and contribute to nutrient pollution and excess algae production. Don't be fooled by packaging that claims a product is environmentally friendly - all products have a downside and require responsible application.
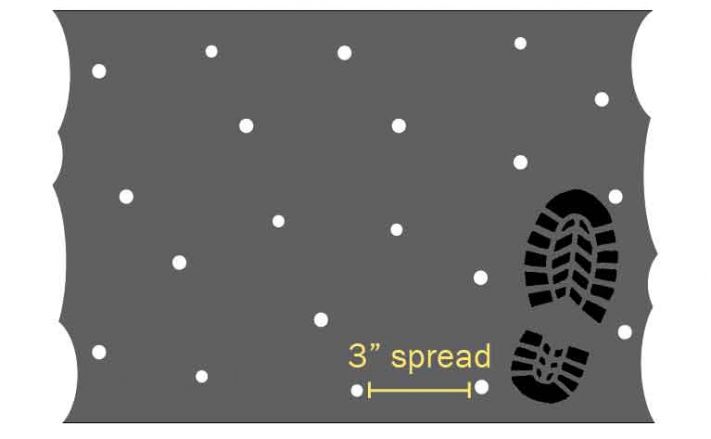
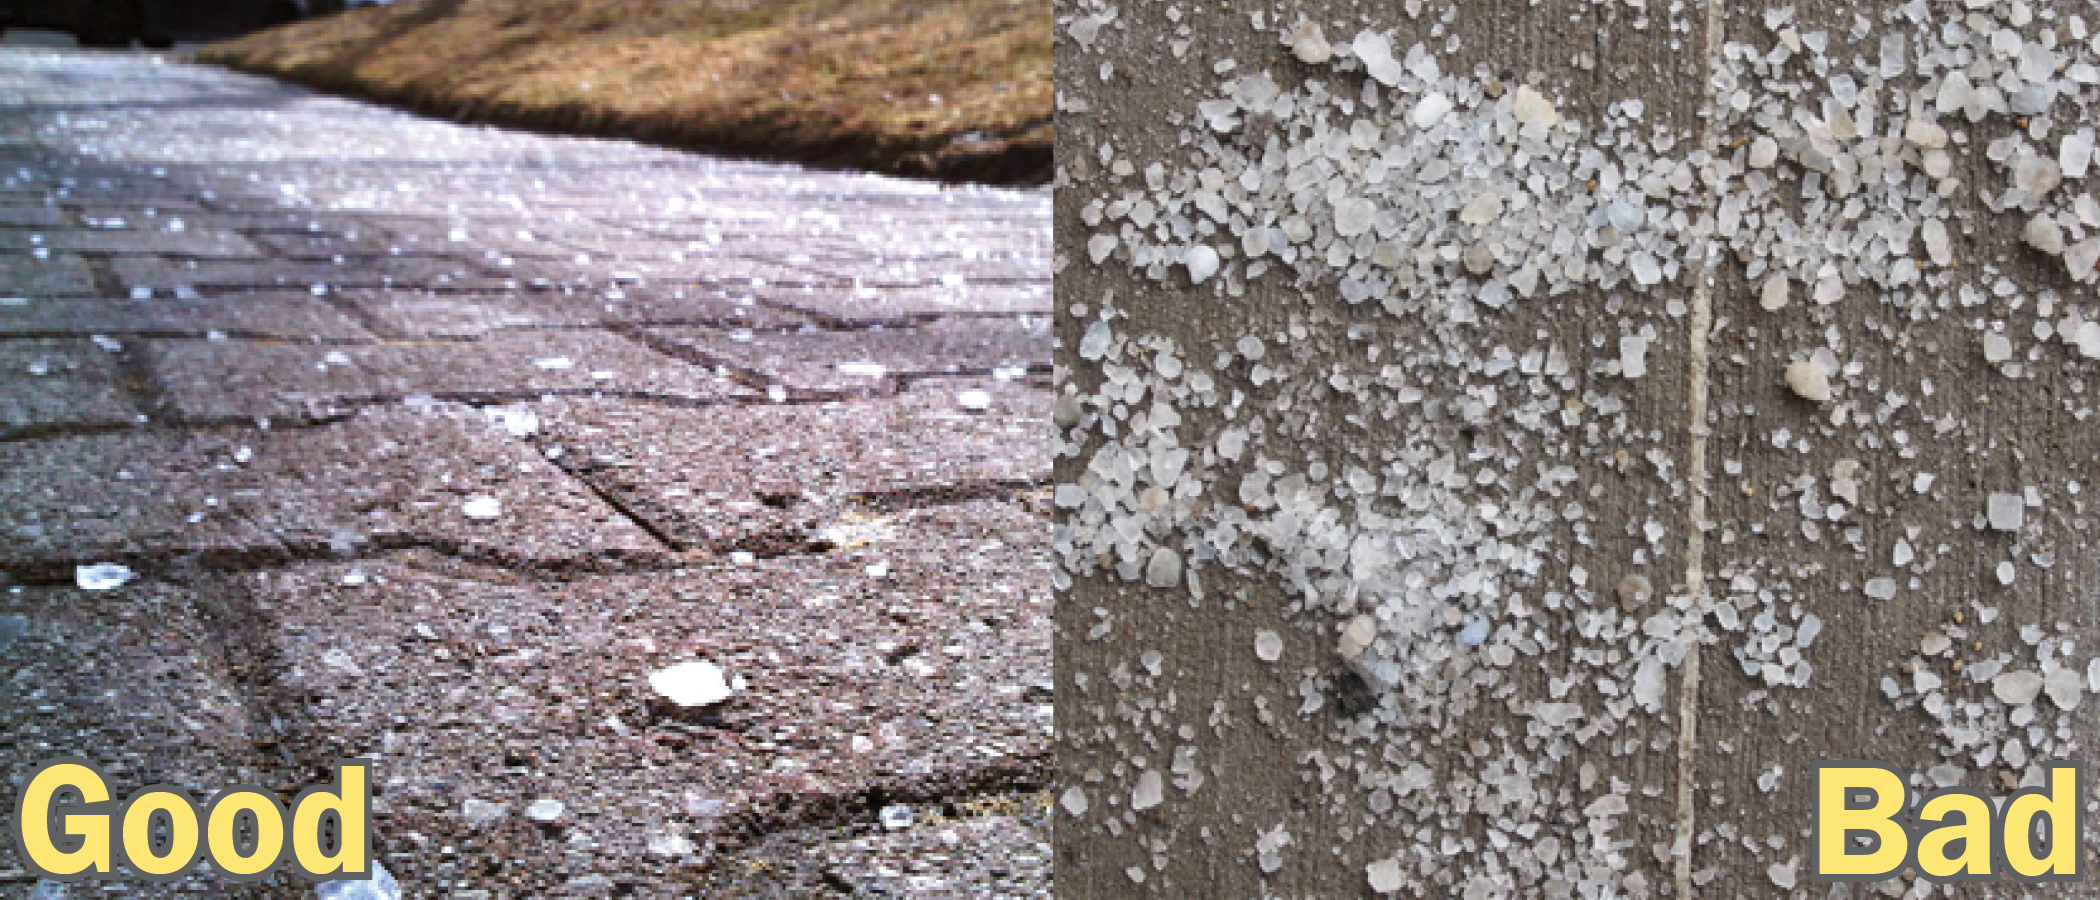
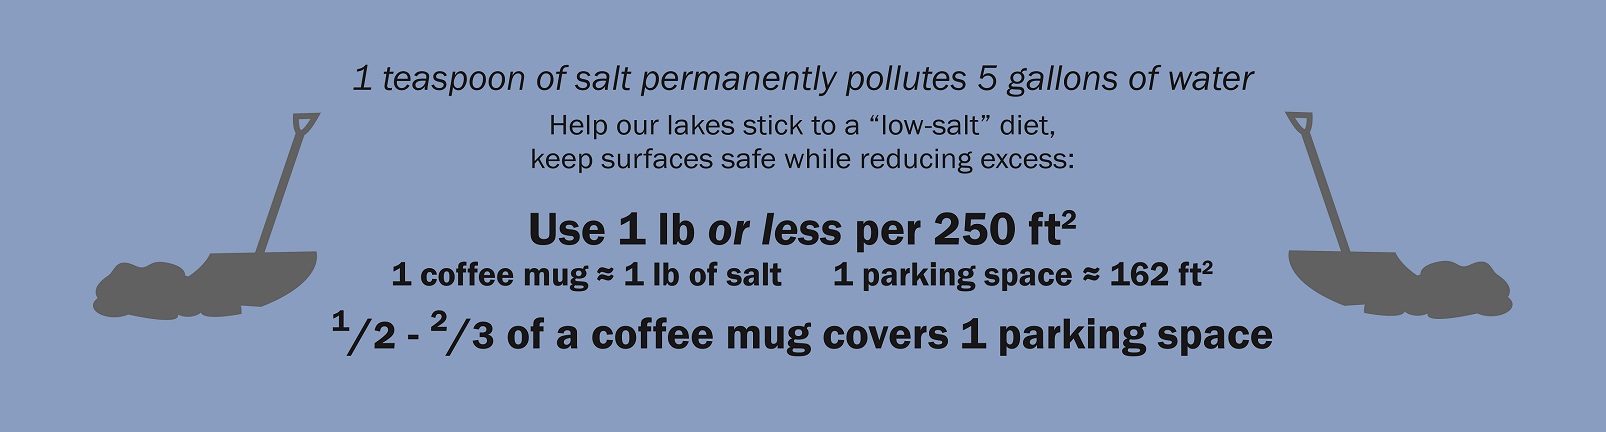
When you must apply salt and de-icer, practice a spread pattern that has no overlapping crystals. This style follows the way salt and de-icer is intended to work: Not just melting the ice that it's directly touching, but also melting the area a few inches around each crystal. Avoiding clumps of salt also reduces corrosive salt damage on sidewalks and other paved surfaces.
With the right product for the temperature and giving the product the proper time it takes to work you can avoid using extra material and maintain a safe surface.
- Never apply dry salt or other dry de-icing products to bare pavement. This increases the chances that it'll blow away or be kicked away by tires or foot traffic. If dry salt is applied before a snow event, the first round of shoveling could also displace it.
- Dry salt isn't intended to be placed on loose snow.
- Use a hand-spreader or shaker instead of scoop, as scoops tend to disperse product in dense piles.
- If its a warm day with melting, don't apply any product. Product applied when ice and snow are naturally melting may be appealing to "speed up" the process, but this is when most salt crystals and dissolved salt run off the surface into a waterbody.
- Error on using less, observe, and re-apply if necessary.
What happens when road salt reaches a lake? Click here to learn about chloride monitoring in local lakes.
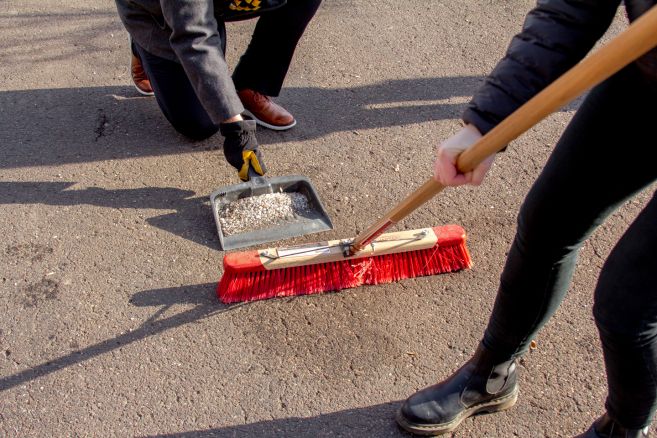
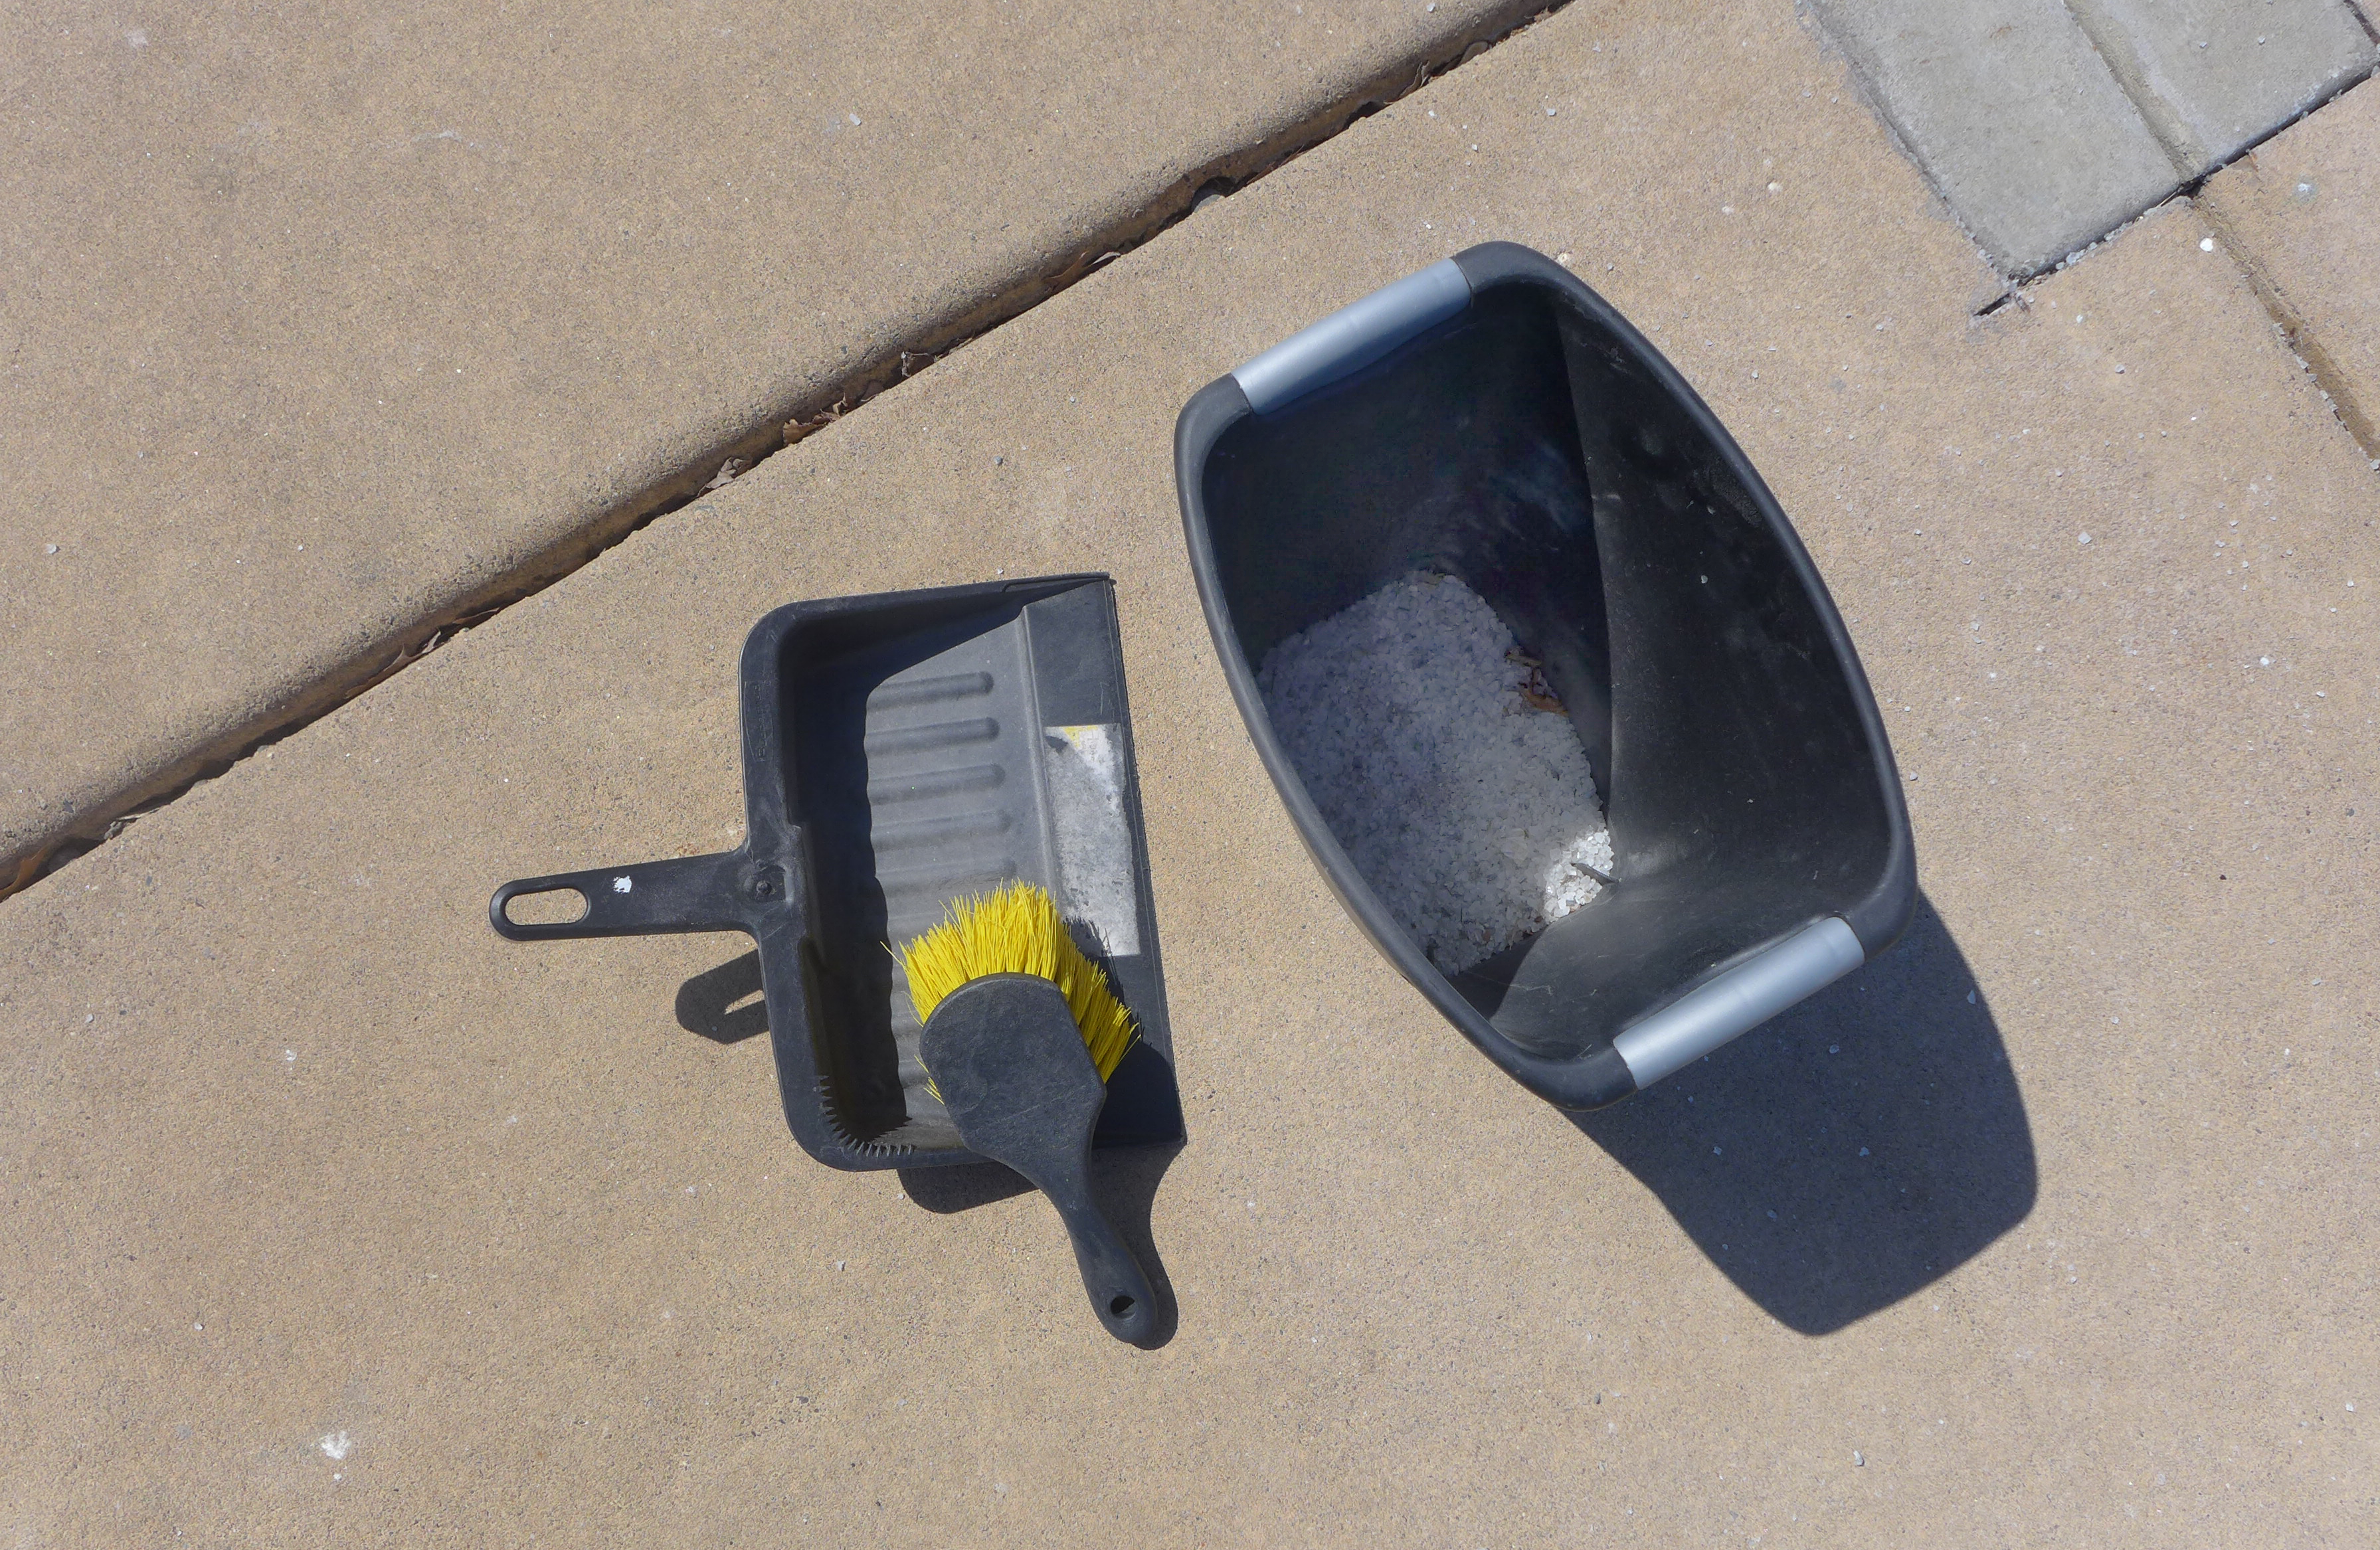
Sweep up extra salt, sand or grit. If dry, salt can be put into a container and stored for later use. Sand that has been driven over may have lost its traction and may need to be thrown away.
When it comes to chloride (salt) pollution, prevention is the only solution. Once salt is in the water, there is no practical way to remove it from the lake, wetland, creek, or aquifer. We all share the responsibility to make smart salting a learning process and routine practice.
 Contact us
Phone: (651) 204-6070
Fax: (651) 204-6173
Email: office@vlawmo.org